
Add and Manage Users with SSO in RPT
Any user with the Institutional Administrator role can go into the Review, Promotion & Tenure (RPT) application and adjust the Single Sign On (SSO) field anytime. This article will cover adding new users and managing existing users with SSO. SSO credentials can be added and modified in each of Interfolio's modules. This feature empowers institutions to make changes to SSO or to troubleshoot when users have issues logging into Interfolio products with SSO. Within each module, any user with the Institutional Administrator role can go into an application and adjust one field (SSO ID) whenever someone has an issue logging into the application. This is a place, in-product, that Institutional Administrators can use to spot-check that the proper SSO ID got passed for an individual user, and if necessary, update SSO ID.
Add Users with SSO
1. Navigate to Add User under Users & Groups
Navigation: Users & Groups > Add User
- Click Users & Groups under Review, Promotion & Tenure (RPT) on the navigation menu.
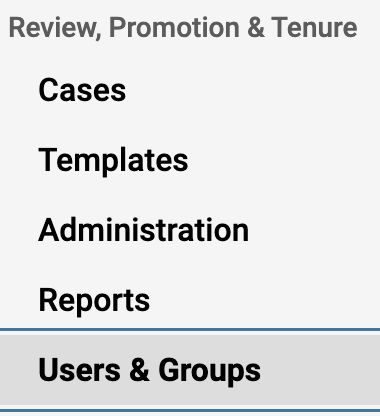
- Ensure the Users tab is selected at the top.
- Click the Add User button in the top right corner.
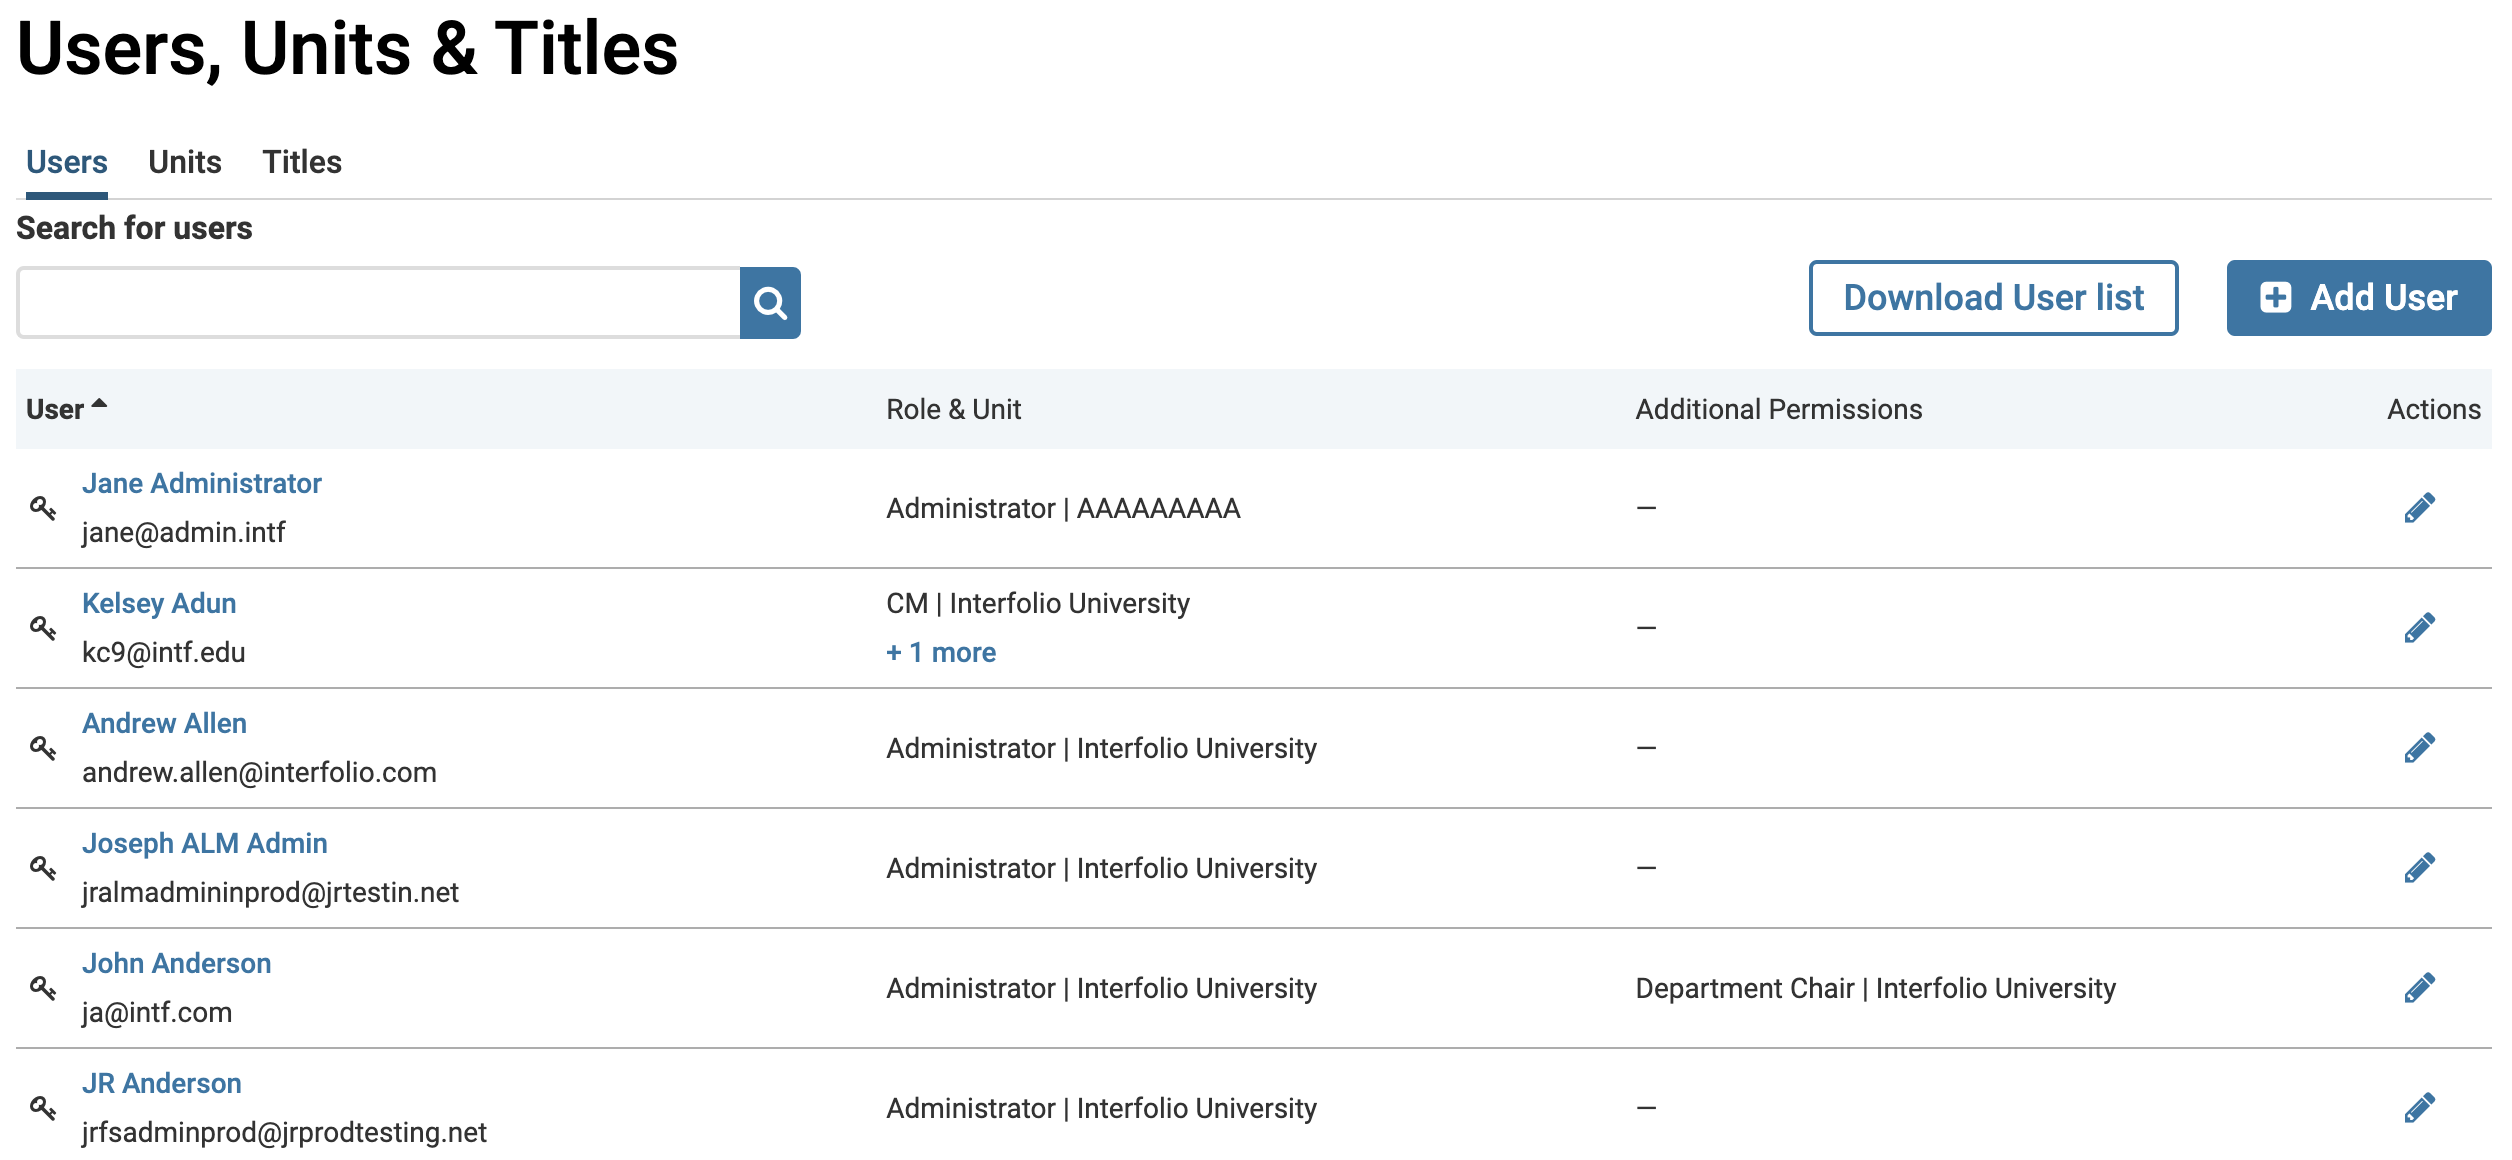
Users with an SSO login are identified by the Key icon to the left of their name.
2. Fill out information
- Enter the First Name, Last Name, and Email.

- If the institution uses UIDs, indicate whether the User Type will be Internal or External.
- To enforce SSO, click the checkbox adjacent to If checked, this user will need to sign on using their institutional credentials.
This will only appear for institutions with the appropriate SSO settings turned on.
- Check the Send new user a welcome message box if desired. You will also have the option to Send a copy of the message to yourself.

- Click Preview to view how the message will appear to the recipient or click Save to add the user and send the message.
Manage Users with SSO
1. Navigate to Edit Users under Users & Groups
Navigation: Users & Groups > Edit
- Click Users & Groups under Review, Promotion & Tenure (RPT) on the navigation menu.
- Ensure the Users tab is selected at the top of the page.

-
Search for users to locate the user whose SSO needs updating.
Users with an SSO login are identified by the Key icon to the left of their name.
- Click the Edit (pencil) icon adjacent to the desired user's name to edit.
2. Edit or Remove SSO ID
- On the User Details tab, the checkbox adjacent to If checked, this user will need to sign on using their institutional credentials on the User Details tab will enforce SSO if selected.

This will only appear for institutions with the appropriate SSO settings turned on.
- Select the SSO Identifier tab to view SSO ID information

- Click Remove SSO ID to remove the SSO ID for the user. Click Remove SSO ID again to confirm the decision.
Note that removing an SSO ID is not recommended and may result in the user losing access to the program. If an SSO ID is removed by mistake, it can always be updated again via the SSO Identifier tab.