Add & Manage Institutional Administrators & Viewers
Institutional Administrators can add users to Lifecycle Management (LM) and assign them one of three roles; Institutional Administrator, Unit Viewer, or Unit Manager. This article explains how to add and manage users of LM and assign and manage user roles.
Add Users
1. Navigate to Add User under Administration
Navigation: Administration > Users > Add User
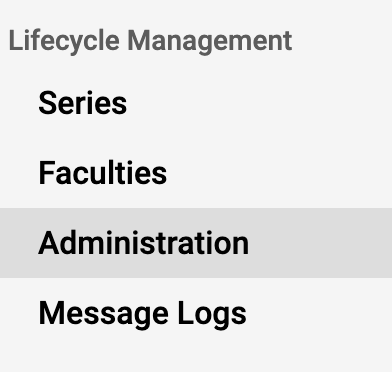
- Click Administration under Lifecycle Management on the navigation menu.
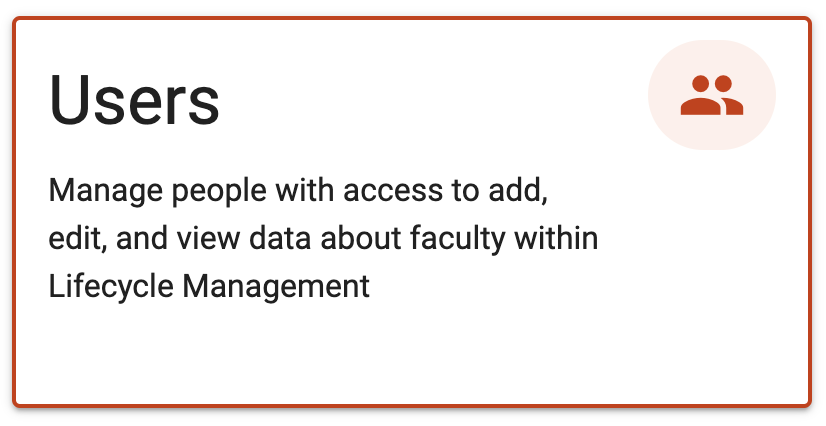
- Click the Users tile.
This will open the Users page where you can view a list of Institutional Administrators and users with the Viewer role at the institution.
Note that faculty do not appear in this list. Faculty are managed from the Faculty Roster page. Only users with the role of Institutional Administrator, Unit Viewer, or Unit Manager can be added and managed from the Users page of Lifecycle Administration. Faculty profiles are created and managed from the Load Data page and Faculty Roster.
- Click the Add User button in the upper right-hand corner to add a user.
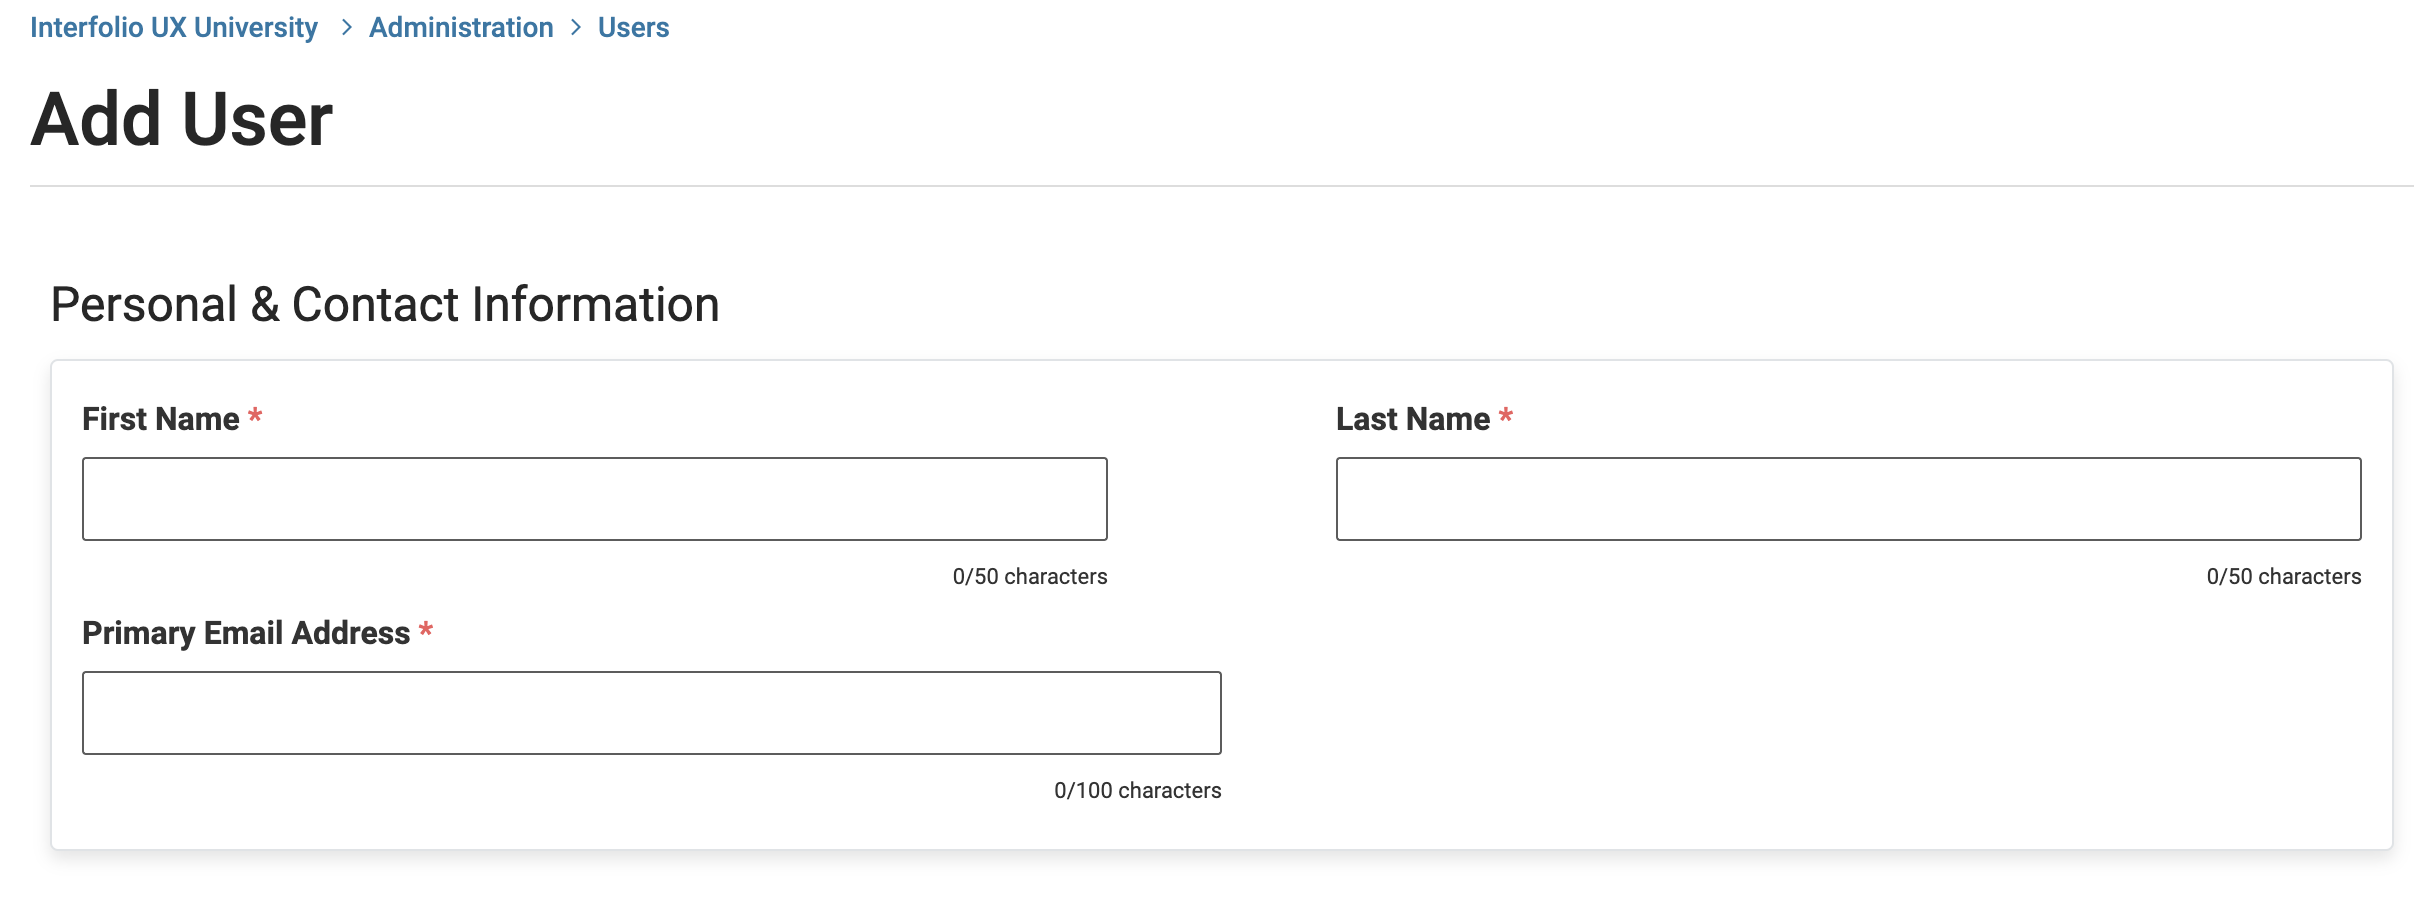
2. Enter user information
- Add the user's Personal & Contact Information.
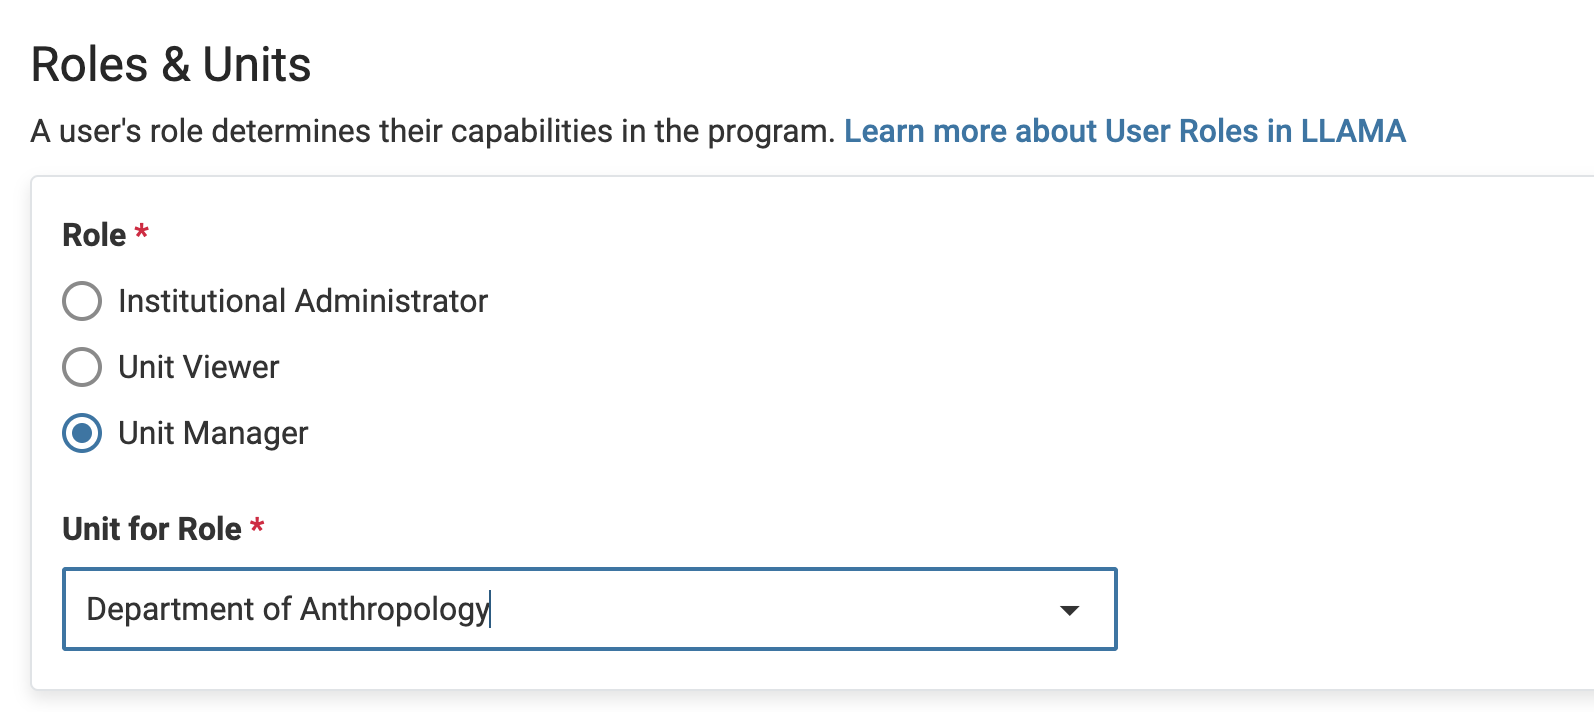
- Select the role and the unit in which the user will have that role under Roles & Units.
- Indicate if you want us to send a welcome Message to User after creating the account. You can personalize this message once the account is created.
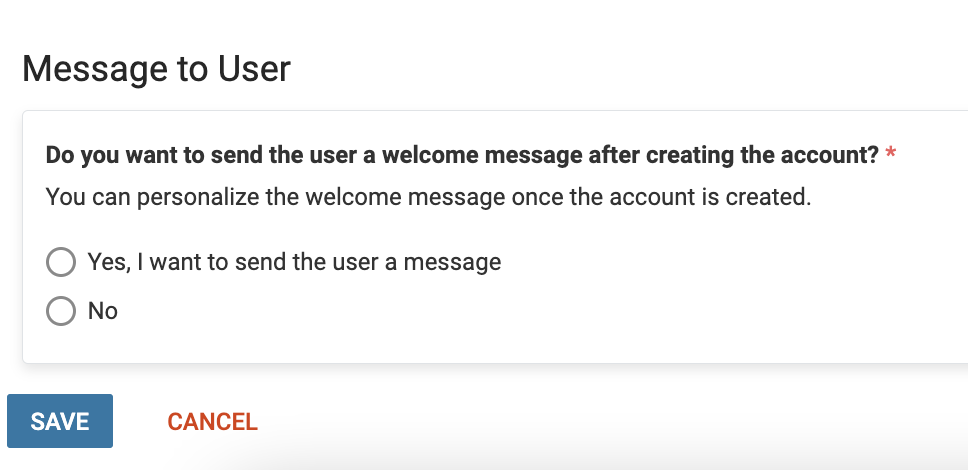
If you indicate to send a message you will need to enter the From Name, a Reply-To address, add a Subject to the email, and enter your message. You can preview how the email will look using the Preview button.
- Click Save when finished.
Manage Users
1. Navigate to the desired User under Administration
Navigation: Administration > Users > desired user name
- Click Administration under Lifecycle Management on the navigation menu.
- Click the Users tile.
- Click the Name of the desired user from the list.
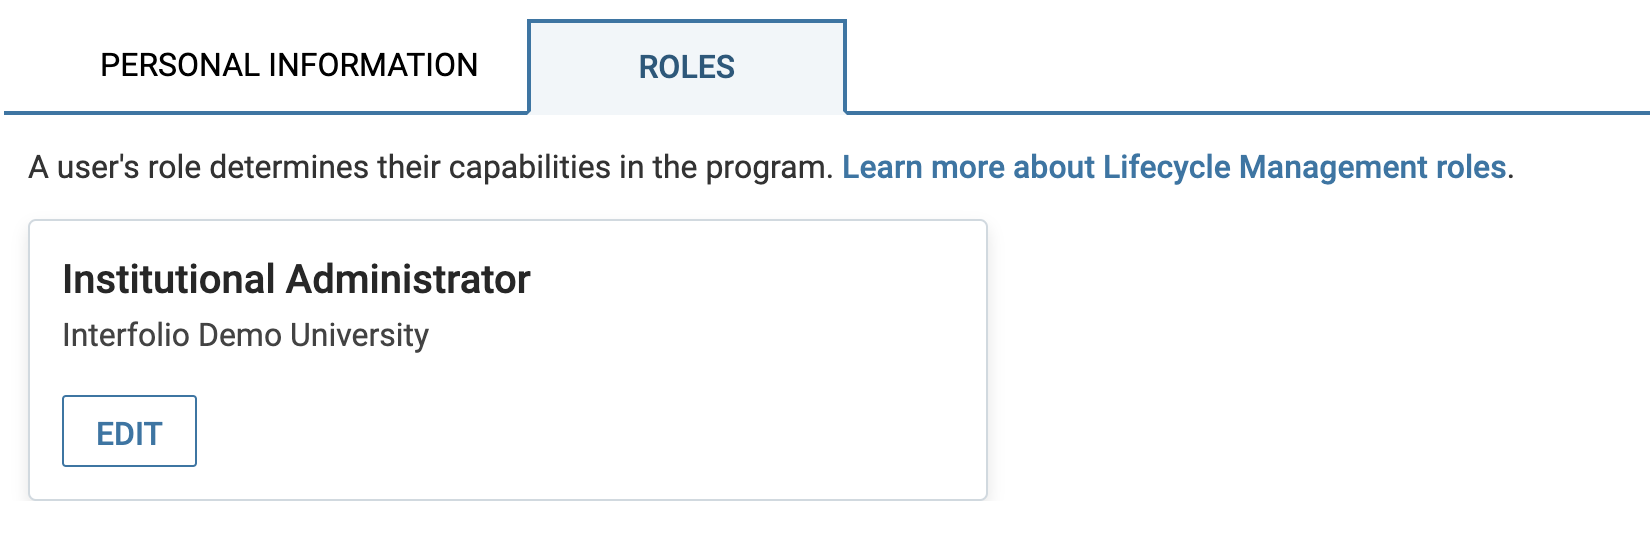
The user's Personal & Contact Information can be edited here, including first and last name and email address.
2a. Change Role
- Select the Roles tab.
- Select the user's Role from the drawer that opens up on the right-hand side.
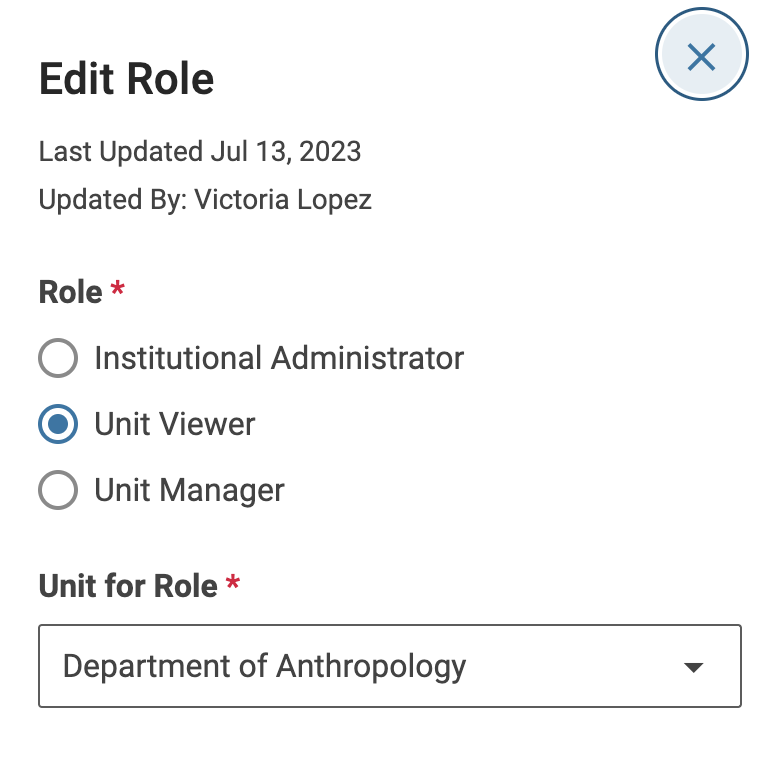
- Click the Edit button to change the user's role in the program.
- After changing the role, select a Unit from the dropdown list of the Unit for Role field.
- Click Save when finished.
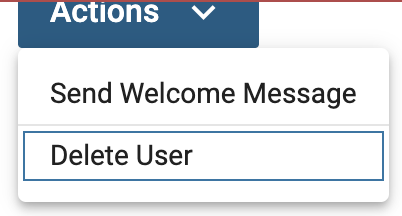
2b. Send Welcome Message
To send or resend a welcome message after making changes to the user's role, select Send Welcome Message from the Actions dropdown in the upper right-hand corner.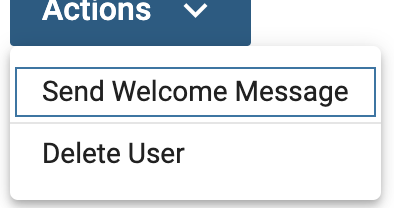
2c. Delete
Select Delete User from the Actions dropdown in the upper right-hand corner.